
Step-by-Step Guide to Planting a Blooming Garden
Introduction
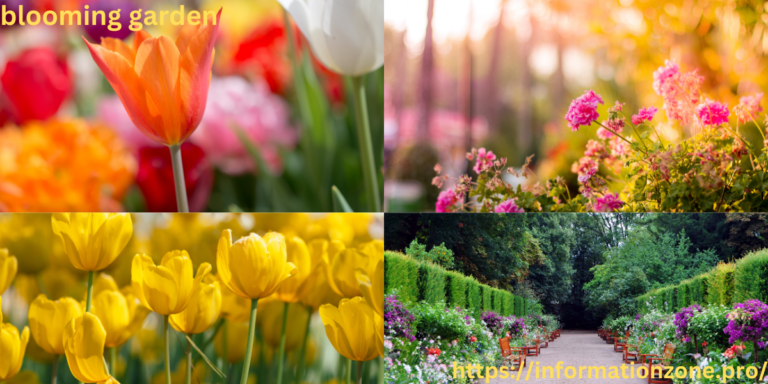
A blooming garden can turn any outdoor space into a vibrant oasis, offering a relaxing retreat, a visual feast, and a great way to connect with nature. Whether you’re an experienced gardener or a beginner, planting a garden with a variety of colorful blooms is an achievable and rewarding task. This step-by-step guide will walk you through the process of creating a blooming garden that thrives year after year.
1. Plan Your Garden Layout
Assess Your Space
Before you start planting, take a moment to assess the space where you want to create your garden. Consider the amount of sunlight it receives each day, the type of soil, and the overall climate of your region. Different flowers have different requirements, so knowing your space’s characteristics will help you choose the right plants.
- Sunlight: Flowers generally fall into three categories based on sunlight needs:
- Full sun (6+ hours of direct sunlight)
- Partial sun (3-6 hours of sunlight)
- Shade (less than 3 hours of sunlight)
- Soil: Test your soil to determine its pH and drainage. Most flowers prefer well-draining, slightly acidic soil, but certain plants thrive in clay or alkaline conditions.
- Space: Consider the size of the area. Some flowers are tall and need more room to grow, while others are compact and work well in smaller spaces.
Sketch a Layout
Once you understand your space’s needs, sketch out a rough plan for your garden. Place taller plants toward the back or center if it’s a circular garden, and shorter plants at the front. This arrangement ensures that all plants receive adequate sunlight and air circulation.
2. Select the Right Flowers
Choosing the right flowers is key to creating a colorful, thriving garden. Be mindful of your garden’s growing conditions, including the climate, soil, and sunlight, as these factors will guide your flower selection.
Consider Seasonal Blooms
To ensure your garden is always in bloom, select a variety of flowers that bloom at different times of the year. Here’s a simple breakdown:
- Spring: Tulips, daffodils, crocuses, and pansies.
- Summer: Sunflowers, zinnias, marigolds, and lavender.
- Fall: Chrysanthemums, asters, and dahlias.
- Winter: Camellias, hellebores, and pansies.
Choosing flowers that bloom in different seasons will help ensure that your garden is filled with color year-round.
Opt for Perennials and Annuals
- Perennials: These flowers return year after year, making them a long-term investment. Popular options include coneflowers, lavender, hostas, and peonies.
- Annuals: These flowers live for only one growing season but are perfect for filling gaps and adding vibrant color. Petunias, marigolds, and impatiens are excellent choices.
A good mix of perennials and annuals provides a garden that offers beauty year after year, with a pop of fresh color each season.
3. Prepare Your Garden Beds
Once you’ve selected your flowers, it’s time to prepare the soil for planting. Proper soil preparation is crucial for ensuring that your plants grow healthy and strong.
Clear the Area
Remove any weeds, grass, or debris from the area. Weeds can quickly outcompete your flowers for nutrients and water, so it’s important to clear them out before planting.
Test and Amend the Soil
As mentioned earlier, test your soil’s pH and texture. Most flowers thrive in slightly acidic to neutral soil (pH 6-7). If your soil is too acidic (below 6), you can add lime to raise the pH. If it’s too alkaline (above 7), add sulfur to lower the pH.
In addition, improve the soil’s texture by adding organic compost or manure. This will help improve drainage, aeration, and provide essential nutrients to your flowers.
Turn the Soil
Use a garden fork or tiller to turn the soil to a depth of 6-8 inches. This will loosen the soil, making it easier for plant roots to penetrate and grow. After tilling, rake the soil level to create a smooth surface for planting.
4. Plant Your Flowers
Follow Spacing Recommendations
Each flower species has specific spacing requirements. Overcrowding your plants can lead to poor air circulation, which can make them more susceptible to diseases. Be sure to follow the spacing guidelines on the plant labels or consult gardening resources for optimal spacing.
- Small flowers: These should be spaced about 6-12 inches apart.
- Medium-sized flowers: Space them 12-18 inches apart.
- Tall flowers: These require 18-24 inches of space or more.
Planting Technique
- Dig a hole that is about twice the size of the plant’s root ball.
- Gently remove the plant from its pot and place it in the hole.
- Fill the hole with soil, gently pressing it down around the plant to eliminate air pockets.
- Water the plant thoroughly to help settle the soil.
Planting Depth
Ensure that you plant flowers at the right depth. The top of the root ball should be level with the soil surface. Planting too deep can cause the roots to suffocate, while planting too shallow can expose the roots to drying conditions.
5. Watering and Mulching
Watering
Proper watering is essential for establishing your flowers. After planting, water them thoroughly. Most flowers require about 1 inch of water per week, either from rainfall or supplemental watering. During the first few weeks after planting, water more frequently to help the roots establish.
It’s best to water early in the morning or late in the evening when temperatures are cooler, to reduce evaporation.
Mulching
Mulching helps retain moisture in the soil, suppress weeds, and regulate soil temperature. After planting, spread a layer of organic mulch (such as wood chips or straw) about 2-3 inches deep around the base of the plants. Be sure to leave a gap around the stems to prevent rot.
6. Fertilizing Your Garden
Flowers need nutrients to grow and bloom to their full potential. You can use a slow-release fertilizer or a balanced liquid fertilizer. Here’s a general guide:
- Perennials: Fertilize in early spring, once the plants begin to emerge, and again in mid-summer.
- Annuals: Fertilize monthly during the growing season.
Be careful not to over-fertilize, as this can lead to excessive leaf growth at the expense of flowers.
7. Maintenance and Care
Deadheading
Deadheading, or removing spent flowers, is an important maintenance task. This encourages new blooms and keeps the garden looking tidy. Some plants, like marigolds and petunias, will bloom more profusely if you regularly remove faded flowers.
Pruning
Prune any dead or damaged stems to encourage healthy growth. This is especially important for bushes or shrubs that may be in your garden plan. Always use clean, sharp scissors or pruners to make clean cuts.
Pest and Disease Control
Regularly inspect your plants for signs of pests or disease. Look for discolored or damaged leaves, wilting flowers, or visible insects. Many common garden pests, like aphids and caterpillars, can be controlled with natural remedies such as neem oil or insecticidal soap.
8. Enjoy Your Blooming Garden
Finally, take time to enjoy the fruits of your labor! Whether it’s relaxing with a cup of tea or taking photos of the vibrant colors, a blooming garden provides a tranquil and rewarding environment. Keep an eye on your plants, and continue with regular maintenance to ensure they thrive year after year.
Conclusion
Planting a blooming garden requires planning, patience, and consistent care, but the results are well worth the effort. By following this step-by-step guide—starting with a solid plan, choosing the right plants, and nurturing them with proper soil, watering, and fertilizing—you’ll be well on your way to enjoying a colorful and thriving garden. Whether you prefer a garden filled with bright annuals or a more perennial-focused approach, the joy of watching your garden bloom is a reward that will last through the seasons. Happy gardening!